Friday, August 31, 2012

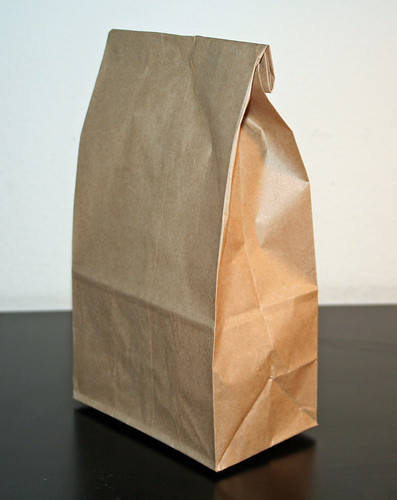
Brown Bag It

www.flick.com, photo by Jeffrey Beall


This blog post is going to be simple and obvious, but it may be the reminder (and motivation) some of us need. We're all busy, right? It's so much easier to go through the drive through at our favorite fast food restaurant at lunch time, or to send lunch money with our kids, than it is to take the time to pack our own lunches, but the benefits of packing healthy lunches for your family far outweigh the ease of buying what someone else has made. Here are some (obvious) benefits to bringing the brown bag:

You Save Money: I get asked all the time, "How do you afford buying all that healthy food?" Well, one easy answer is, "We almost never go out to eat." The amount of money we would spend taking our whole family out to eat two times per month easily covers the extra we spend on healthier foods. Let's face it: It costs less to pack your own lunch than it does to buy it. So, do we ever buy lunch? Well, of course we do, but not very often. I'd much rather spend that extra money on real food.

You Control the Ingredients: Even if you order a salad at a restaurant, are you really controlling the ingredients? How do you know they even washed the pesticide-laden produce? That grilled chicken you ordered--what did they inject into it, or brush over it? You don't know. Even some of my favorite restaurants, that I would consider healthier than the rest, add a lot of additives, sugars, and other disgusting things to their food. Of course they do! They're not in the health food business. They're in the "taste good" business.

You Get to Include the Food Groups (for real): When you pack a well-balanced lunch for your kids, you're probably not counting tomato paste as a vegetable, and the fruit you give them can be fresh, not dumped out of a can and enhanced with corn syrup.

You Can Limit Sugar: Want your kids to be able to concentrate better and do better in school? Want to avoid that 2:00 slump for yourself? Don't eat a lunch that's full of sugar! Hopefully, you wouldn't pack a lunch full of candy bars and Pop-Tarts, because the sugar content there is obvious, but a lot of other foods are full of hidden sugars as well. Peanut butter and jelly sandwich? Look at the ingredients in the bread, the peanut butter, and the jelly. Sugar, sugar, sugar, unless you have taken the time to specifically purchase each of these without added sugar. You can do it, actually, and it's not that hard (or expensive!) You just have to read the ingredients.
I can guarantee you, however, that if someone else is making that lunch, they aren't going to buy healthy varieties. You're not going to get fruit packed in fruit juice or no sugar added peanut butter. If you want to limit the sugar, you've got to pack it yourself.

Is packing your own lunches more work? Of course, but making healthier choices for your family requires a little effort. The benefits far outweigh the few minutes it takes to give your family the best each day.

Wednesday, August 29, 2012

Get Some Iron

www.flickr.com, photo by JD Hancock


We need iron. It helps us fight against disease, helps carry oxygen throughout our bodies, improves our liver function, protects against the actions of free radicals, and more.

Many of us, however, especially if we're women, can run low on iron, which is called anemia. According to www.healthy-vitamin-choice.com, the following are some symptoms of insufficient iron:

Iron deficiency can lead to anaemia when the iron stores in the body become depleted and hemoglobin synthesis is inhibited.
Symptoms and signs of anaemia include:
  • feeling tired and weak,
  • lacking stamina and decreased work and school performance,
  • slow cognitive and social development during childhood,
  • difficulty in maintaining body temperature,
  • decreased immune function, which increases susceptibility to infection,
  • breathlessness,
  • headaches,
  • insomnia,
  • loss of appetite, and
  • pallor.
All the above are associated with decreased oxygen supply to tissues and organs. Iron also plays an important role in the immune system, people with low iron levels having lowered resistance to infection.

I don't know about you, but I want to get enough iron so my body can function better! Here are some tips to help you get enough iron, and to help your body absorb and use the iron it gets.

Eat Iron-Rich Foods: red meat, egg yolks, dark, leafy greens like spinach, prunes, raisins, artichokes, beans, and lentils are all excellent sources of iron.

Take a vitamin: Make sure the vitamin you take actually gives you iron. Many do not. I wouldn't feed my kids those "gummy" vitamins anyway, because of all the junk they typically contain, but gummy vitamins almost always do not provide iron. Read the label.

Cook in a cast iron skillet: The iron from your skillet leaches into your food, upping the iron content of anything you cook in it.

Watch what you pair with your iron intake: Ok, it's story time. When my kids were really little, they struggled with low iron. I gave them a multi vitamin with extra iron, but it still didn't help. Finally, our nurse asked me what I was giving my kids to drink with their vitamins. I had been giving them milk. Big mistake.  Apparently, what you drink when you take in iron can dramatically affect how well your body absorbs the iron. Orange juice is the best. If you drink orange juice with your vitamin, it will enhance the way your body absorbs the iron. Water is pretty much neutral, but milk can actually prohibit your body's ability to absorb the iron you're taking in. (The same is true of coffee and tea.) I'm certainly not telling you to stop drinking milk, but if you take a multi vitamin with iron, try drinking orange juice or water with it, and leave the milk drinking for another meal.

What tips do you have about increasing iron? I'd love to hear them! Please share in the comments below.

Monday, August 27, 2012

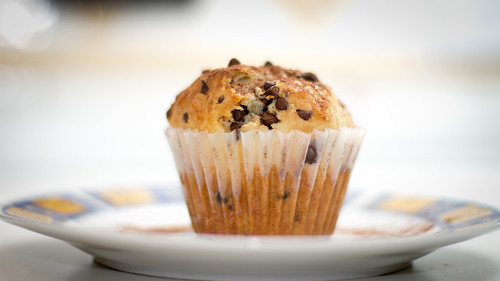
Chocolate Chip Sour Cream Muffins

www.flickr.com, photo by Nicola since 1972


It's Monday, and at the Keys' house, that means it's...Muffin Monday! So, today, I'm going to share another muffin recipe with you. This recipe is from Taste of Home, and I only had to make very minor changes in order to make it less refined. As I've mentioned before, yes, it does have chocolate chips in it, and yes, they do have some sugar in them. Feel free to use carob chips, if you prefer, or purchase a bar of very dark chocolate in the "health" section of your grocery store and break it into chunks, if you want. I simply buy the darkest chocolate chips I can find, and I use them sparingly. Don't forget to check the ingredients. I compared the Ghirardelli dark chocolate chips with the other brands at my local store, and the ingredients were quite different. Some of the other options had a lot more "junk" in them than the Ghirardelli.

One other side note: please check the ingredients of your ingredients! Make sure your vanilla doesn't have added corn syrup, your baking powder is aluminum free, and that you don't buy the reduced fat dairy products. Starting with ingredients that don't contain extra, unwanted ingredients will get you off to a better start.

Anyway, on to the recipe!

Sour Cream Chocolate Chip Muffins

Ingredients:
1 1/2 cups white whole wheat flour
2/3 cup sucanat*
3/4 tsp. baking powder
3/4 tsp. baking soda
1/4 tsp. sea salt
1 egg
8 ounces sour cream (full fat, please!)
5 Tbsp. butter, melted
1 tsp. vanilla
3/4 cup chocolate chips

Directions:
Mix the dry ingredients together in a bowl. In a separate bowl, mix togethr the egg, sour cream, butter, and vanilla. Mix the wet ingredients into the dry until just moistened. Do not overmix. Fold in chocolate chips.

Grease a muffin tin with olive oil, and fill each cup 1/2-3/4 full. You will get 12 muffins. Bake at 350 for 20-25 minutes. They will bounce back to the touch when they are done. Cool for 5 minutes before eating.

*I've been using sucanat lately as a sweetener. I can find it in the bulk section of Whole Foods for a lot less money than I was spending on coconut palm sugar. Coconut palm sugar is also wonderful, however, and would work fine in this recipe as well.

Wednesday, August 22, 2012

Cheesy Chicken...Revisited

A while back, I wrote a post about one of our family's favorite recipes, Cheesy Chicken. In this post, I tried to explain why I still used chicken boullion cubes in this recipe. I had looked at ways to make your own boullion, and that wasn't something I was willing to do at the time.

However, after publishing the post, I started to feel guilty. Why, exactly, was I still using an ingredient like boullion cubes, full of junk my family is trying to avoid, in a recipe we eat quite often? I decided there must be a better way to make this dish without going to all the trouble of boiling down and freezing broth to make homemade boullion.

It was so easy! The original recipe calls for 2 cups of water, plus 3 crushed boullion cubes. Instead, I just substituted about 1/2 cup of the milk with homemade chicken broth, and added some additional salt. That's it! The recipe still tastes great. Check out the "even less refined, new and improved" cheesy chicken recipe below!

Cheesy Chicken
Ingredients:
1/4 cup butter
1/4 cup whole wheat flour
1 and 1/2 cups whole milk
1/2 cup chicken broth1-2 tsp. salt (to taste)

2 cups cooked chicken, shredded
Cheese

Directions:
Melt butter in a large skillet, then stir in the flour. Gradually add milk, broth, and salt, and whisk. Continue stirring over medium heat, until the mixture thickens and begins to boil. Add chicken and cook until heated through.
Serve over brown rice, wild rice, or faux-tatoes, and sprinkle cheese on top. The original recipe calls for cheddar, but unless you can find organic or raw cheddar that hasn't been colored yellow, I recommend Monterey Jack or another non-yellow cheese

Monday, August 20, 2012

Webinar on the Dangers of the Flu Shot

Every year, we see announcements, posters, and other tactics that try to convince us we need to get our annual flu shots, but are they necessary? How much do they help? Why would any sane person just decide not to take this precaution?

If you're interested in learning more about the dangers of getting the flu shot, check out Maximized Living's webinar on the flu shot!

When: Tuesday, Aug. 21, 2012, 7:00 p.m.

Where: Online

To register and receive the link for this important event, contact:

180 Chiropractic and Wellness: 615-595-9063 or info@180chiro.com

Wednesday, August 15, 2012

When You Know You've Really Changed...

Recently, I had a week where I kind of fell off the wagon, so to speak. Although I still cooked unrefined, real food at home, our family had way more "cheats" than normal, I didn't surge train all week, and I stayed up too late and got up too early several days in a row. Do you see where this is going?

Crash and burn.

I'm not even going to tell you I had a great time. After each processed, refined meal or snack, my body felt sluggish and gross. I couldn't think as clearly. My energy plummetted and I found myself increasingly cranky.

At the end of the week, my husband and I took our kids to the park to play. While we were there, my 8 year old spied a walking trail and asked where it went. Normally, I would've jumped at the chance to explore it with her. Instead, I lazily sat on the bench and had to tell her I was too tired to walk the trail with her.

I looked at my husband. "This week proves to me how much we've changed," I told him. "In the past, I would've made excuses, like, 'I'll go back to eating healthy on Monday,' so I could enjoy more time eating junk food. But now...I don't want to eat any more of it." We were all so relieved to know that supper that night would be our own homemade pizza.

A few hours later, I needed to get a few things at the grocery store. As my cart filled up with coconut milk, Ezekiel bread, and organic produce, it felt familiar and comforting to me, and I realized once again how much we have changed. I remembered the first few times I filled my cart up with that "weird, healthy stuff" and how odd it felt, how I longed to buy the junk, and how scary it actually was. This time, I walked right past the Oreos, ice cream, and chips. They didn't "call out" to me at all, Truthfully, I didn't even notice them.

I wanted to write this post to encourage you if you are still struggling with embracing a healthier lifestyle. Perhaps the junk food still calls out way too loudly when you're at the grocery store, or those doughnuts in the break room at work seem to just jump into your hand.

I want to write to tell you that this is possible, and that this is worth it. No dessert tastes as good as having the energy to explore those trails at the park with my kids feels. No fast food value meal tastes as good as waking up in the morning energized and ready to tackle my day feels. No packaged, processed meal is as convenient as knowing I have excess energy to accomplish all the tasks a busy mom has to accomplish in a day.

If you're struggling to make healthier choices, don't give up. Feeling good is only one of the perks, but in this mom's mind, it's a huge one. Today, make the choice to put down the sugar so you have more energy for those important people you love.

Monday, August 13, 2012

Oatmeal Chocolate Chip Nut Butter Cookies

I love these cookies. I love that they're flourless, filled with protein, and my kids will actually eat them. That may have something to do with the chocolate chips... As I've mentioned before, we make allowances for chocolate chips sometimes. We buy the Ghirardelli dark chocolate chips. They're the darkest we can find, and their list of ingredients, although definitely less than perfect, is a lot less scary than the lists on some of the other brands.

Oatmeal Chocolate Chip Nut Butter Cookies

Ingredients:
1/2 cup raw almond butter
1/2 cup all natural peanut butter
1/4 cup honey
1 dropper of liquid stevia
1 large egg
1 overflowing tsp. vanilla
3/4 tsp. baking soda
1/2 tsp. sea salt
1/2 rolled oats
1/2 cup chocolate chips

Directions:
Preheat oven to 350 degrees and line 2 cookie sheets with parchment paper. In a large bowl, mix together the almond butter, honey, stevia, and egg. Add the vanilla, baking soda, salt, and oats and mix everything together. The batter will be very thick and sticky. Stir in the chocolate chips. Drop cookies onto the lined cookie sheets using two spoons. Gently flatten. Bake for 12-15 minutes, then cool on the cookie sheet for an additional 10 minutes before transferring to a cooling rack.

Friday, August 10, 2012

Hot Fudge Dessert

My mom made this dessert for us occasionally when we were growing up. She always baked it in a particular blue speckled baking dish. I don't ever remember her baking anything else in that dish--it was the hot fudge pudding dish, as far as I was concerned.

When I grew up and wanted to make the recipe for myself, it actually kind of threw me a little that I had to make it in a regular baking dish!

Although the recipe has hot fudge in the name, it was actually quite effortless to adapt to our less refined lifestyle. Consider pairing it with some homemade vanilla ice cream for a delicious dessert free of refined sugar and flour! Amy Green has a fabulous vanilla ice cream recipe in her cookbook, Simply Sugar and Gluten Free.

Hot Fudge Dessert


Ingredients:
1 cup white whole wheat flour
2 tsp. baking powder
1/4 tsp. sea salt
1 and 3/4 cup coconut palm sugar, divided
2 Tbsp. + 1/4 cup cocoa powder
1/2 cup milk
2 Tbsp. olive oil
1 and 3/4 cup hot water

Directions:
Preheat oven to 350. Blend flour, baking powder, salt, 3/4 cup coconut palm sugar, and 2 Tbsp. cocoa in a 3 quart casserole baking dish. Into this mixture, stir milk and oil. In a separate bowl, blend together the 1 cup coconut palm sugar and 1/4 cup cocoa. Sprinkle the sugar/cocoa blend over the batter. Pour the hot water over everything. Do not stir. Bake for 45 minutes. Serve warm.

Wednesday, August 8, 2012

Lifestyle is the New Genetics

On average, children watch television for eight times as many hours as they spend having meaningful conversation with their mom and dad. Don't let advertisers control your children's decisions on health.

Join our sponsor, 180 Chiropractic and Wellnes, for a FREE Advanced Talk where they'll show you how raising a healthy family can be as simple as improving personal choices.


When: Monday, Aug. 13, 6:00 p.m.

Where: 180 Chiro
            4091 Mallory Lane, Suite 114
            Franklin, TN 37067

For more information or to sign up, contact 180 Chiro at 615-595-9063 or info@180chiro.com

Monday, August 6, 2012

Beef Tips...Revisited

One of my first blog posts was a recipe for beef tips--a slow cooker recipe that was easy and, well, unrefined! When I adapted the recipe from Taste of Home's Simple & Delicious, I had to leave out the canned cream of chicken soup. I had no idea at the time that it was so easy to make cream of chicken soup, so I just left it out! The beef tips made from the earlier posted recipe taste fine, but... if you add some homemade cream of chicken soup to them, they're even better! So, I wanted to repost about the beef tips, giving an updated recipe.

Beef Tips


Ingredients:
1 pound beef sirloin tips, cut into 1 inch cubes (I also use different cuts of beef)
2-3 medium carrots, chopped
1 to 1 1/2 cups chopped celery
1 cup chopped onion
1 recipe cream of chicken soup
1 cup beef or chicken broth

Mix all of the ingredients together in the slow cooker. Cook on low for 6-7 hours, or until the meat is tender. Serve over 100% whole wheat egg noodles, spaghetti noodles, or faux-tatoes.

Friday, August 3, 2012

An Easy Pizza Lunch

We make homemade pizzas regularly, and I often double or triple the sauce and refrigerate the leftovers to use for quick and easy lunches like this one, or pizza pockets. It's quite convenient to have the sauce ready to go, especially when the day is busy and the family is hungry!

This is a super easy and fast lunch, and it's a big hit at our house. Because the recipe uses Ezekiel bread, you can rest assured that you're giving your family an excellent source of protein as well.

Toasted Pizzas


Ingredients:
Ezekiel bread
Pizza sauce (about 2 Tbsp. per slice of bread)
Mozzarella cheese (about 1/4-1/2 cup per slice of bread)
Garlic powder

Directions:
To make these pizzas, toast your slices of Ezekiel bread. Spread pizza sauce on the slices, then top with cheese and sprinkle with garlic powder. Bake at 425 until the cheese bubbles and begins to brown.

Wednesday, August 1, 2012

Homemade Stromboli

This stromboli makes a great warm meal at home, or a delicious cold one packed as a lunch. It isn't difficult or labor intensive, but you'll need to make it on a day when you have extra time for the dough to sit on the counter and rise.

Our family generally avoids pork products, but we make an exception for this recipe, simply because we like it best with ham. You certainly don't have to use ham, however. You could use turkey, chicken, or leave out the meat altogether. I've adapted this recipe from Taste of Home's Simply & Delicious, and The Bread Beckers, Inc.

Mozzarella Ham Stromboli

(makes 2 loaves)

Ingredients:
1 1/4 cup hot water
1/2 cup milk
2 tsp. quick rise yeast
2 Tbsp. olive oil
1 Tbsp. honey
4-5 cups white whole wheat flour
2 tsp. salt
1 package deli ham, 8-12 ounces*
4 cups mozzarella cheese, shredded (buy block and shred yourself)
2 Tbsp. melted butter
2 Tbsp. parmesan cheese

*Watch the ingredients in deli meat. They often add refined sugar, nitrites, and nitrates to their meat. Applegate meats do not contain these added ingredients. For a less expensive option, try Hormel's Natural Choice deli meats. They also do not add nitrites or nitrates, and use turbinado sugar instead of white sugar.

Directions:
In a large bowl, combine the water and milk, then add the yeast. Let this mixture set for a few minutes, then add the oil, salt, and honey. Gradually add the flour, mixing with a heavy spoon, until well mixed. The dough will be slightly sticky. Cover the bowl with a towel or plastic wrap and let it rise until double.

Turn the dough out onto a well floured surface. You may need to sprinkle a little flour over the dough as well to make it workable. Divide the dough in half. Set half the dough back in the bowl, and roll out the other half into a large rectangle.

On the rectangle, layer half the meat and half the cheese, making sure to leave about an inch of dough around the edges uncovered. Roll up the dough from a short side, then pinch together the seams. Place the loaf, seam side down, on a greased shallow pan.

Roll out the second half of dough, layer the meat, and cheese, pinch together the seams, and place it on another greased shallow pan.

Leave both loaves setting out to rise for 60 to 90 minutes, then brush the melted butter on the loaves. Sprinkle on the parmesan cheese, then bake the loaves at 375 for 15-25 minutes, or until golden brown.

If you plan to pack the stromboli as a cold lunch, cool it in the refrigerator before cutting.