Thursday, November 15, 2012

Stove Top Popcorn

My parents have had the same hot air popcorn popper since I was a kid. It still works. A couple of weeks ago, I got to visit them for my brother's wedding, and we had a movie night. Rather than pull out the microwave popcorn, which is terrible for you, my mom pulled out her air popper. It was so much fun!

You know that old saying, "They don't make things like they used to"? Well, I think that's true of hot air poppers. We've gone through two in a year. We've had all sorts of problems. Perhaps it's because we keep buying the less expensive (cheap!) poppers. Perhaps it's because my mom's popper was just simply made better 30 something years ago.

Whatever the reason, we've decided not to buy another one. Our family really likes popcorn, though. It's a whole grain, it's cheap, it's delicious and easy to make, and if you make it yourself, it can actually be healthy!

So, I looked around for some stovetop recipes and I found one I really liked. I want to share it with you. If you have a great hot air popper that works well, that's fabulous! But, if you don't have one, and you want to make some delicious popcorn without all of the nasty ingredients they put in microwave popcorn, try this recipe!

Perfect Popcorn Recipe

adapted from Simply Recipes

Ingredients:
3 Tbsp. grapeseed oil (it has a higher smoke point than olive oil)
1/3 cup popcorn kernels
1 3-quart covered saucepan
2 Tbsp. (or more) of butter, to taste
Salt, to taste

Directions:
Heat the oil in the saucepan over medium-high heat. Place 3-4 popcorn kernels into the oil and cover the pan. When the kernels pop, add the rest of the 1/3 cup of kernels, and shuffle the pan a little so they lie in an even layer. Cover the pan, and remove from heat for 30 seconds. (I just set the timer to make it easier.) According to Simply Recipes, "This method first heats the oil to the right temperature, then waiting 30 seconds brings all of the other kernels to a near-popping temperature so that when they are put back on the stove, they all pop at about the same time."
After the 30 seconds removed from heat, place the pan back on the burner. Gently shake, or shuffle, the pan while it pops to prevent burning. When the popping slows to a couple of seconds between pops, remove the lid and pour the popcorn into a large bowl.
You can then melt your butter right in the same pan where you just cooked your popcorn. Pour the melted butter and salt over your popcorn, and stir (or shake) well to mix. Enjoy!
Monday, November 12, 2012

Bitter Sweet: The Sharp Bite Behind the Sugar High

Did you know that preventing diabetes can be as simple as eating better and staying active? Nearly all cases of diabetes are treatable and preventable with proper lifestyle choices, yet 1 in 3 people are diabetic or pre-diabetic.

Would you like to make choices today that could save you a diabetes diagnosis, as well as the hundreds of thousands of dollars it would cost you over a lifetime? Help us take a stand against this debilitating disease.

Maximized Living can teach you about the risk factors fueling diabetes and how to overcome them. Based on their 5 Essentials, they can show you the practical lifestyle choices that can help you thwart the threat of diabetes, both in your life and in your community.

Join our sponsor, 180 Chiropractic and Wellness, for a free workshop on diabetes!
Learn how to:

  • Decrease your risk of diabetes
  • Balance your blood sugar
  • Reduce your dependence on prescriptions
  • Overcome your genetic tendencies
  • Increase energy and speed up healing
This FREE workshop will take place Monday, November 19, at 6:00 p.m.
Where: 180 Chiropractic and Wellness
4091 Mallory Lane, Suite 114
Franklin, TN 37067

For more information, or to sign up, contact 180 Chiropractic and Wellness at: 615-595-9063 or check out their website: www.180well.com

Friday, November 2, 2012

School Lunch Ideas

Now that school has been in session for awhile, the whole task of packing lunches is getting old. I only have to do it 2 days a week, and I still struggle with packing the same things over and over. So, I turned to some blog posts I'd read awhile back to re-inspire me. Perhaps they'll give you some ideas, too!

100 Days of Real Food: homemade school lunches

More Homemade School Lunches

Still More Homemade School Lunches

School Lunch Roundup

School Lunch Roundup II

What great ideas do you have about packing healthy school lunches? I'd love to hear them! Please include them in the comments below.

Wednesday, October 31, 2012

Halloween "Treats"

Am I the only one who walks through the grocery store cringing at the amount of candy lining ENTIRE AISLES for Halloween? Am I the only one who looks at the price and says, "No way am I paying that much      for pure junk!"? Some of these bags of candy top the $10 mark. For a bag of candy!!

I am not going to tell my kids they can't have any candy for Halloween. It's a special occasion. I get it.

I will, however, try to make this night fun for them in some additional ways that don't focus completely on candy. I also want to hand out some alternative treats to the little people who ring my doorbell. We've actually done this quite a bit in the past few years, and the kids really enjoyed getting something different.

If you haven't already gone out and bought your candy stash, here are some alternative "treats" that won't break the bank:

* Glow bracelets.
* Mini tubs of Play Doh.
* Cheap trinkets, like plastic/rubber animals, spider rings, etc.
* Stickers or tattoos
* Pencils
*Check out the party aisles for individual sized bottles of bubbles, cheap toys, etc.

You might also want to check out the book, Redeeming Halloween. It gives some great alternative (and super fun!) ways to celebrate without participating in all the creepiness.

Monday, October 29, 2012

Free Burst Training Class!

Now that cooler weather is here, it's so easy and tempting to fill up on comfort foods, snuggle up inside, and forget about exercise, but keeping your body strong and healthy is super important, especially during the time of year when people tend to get down and sick more.

Burst training is so fast, it doesn't take much time out of your schedule at all. I just do it in my garage first thing in the morning, and then I'm set for my day. If you want to learn more about burst training, or maybe even just get some new tips, check out the free burst training class TONIGHT!


WHAT: Free Burst Training Class
WHERE: 180 Chiropractic and Wellness, 4091 Mallory Lane, Suite 114, Franklin, TN
WHEN: Monday, Oct. 29, 2012, 6:00 p.m.

Monday, October 22, 2012

Pumpkin Bars (and Cream Cheese Frosting!)

Yesterday, I made one of my favorite fall desserts. Make no mistake, while this recipe is less refined and healthier than a lot of desserts, it is still dessert. It is by no means low on the glycemic index. The sugars in it are not the anti nutrient that white sugar is, but they are still natural sugars. So, enjoy this dessert, but in moderation!

Pumpkin Bars
adapted from Taste of Home's Quick Cooking

Ingredients:
1 and 1/2 cups pumpkin puree
1 cup sucanant, rapadura, or other less refined sugar
1 cup honey
1 cup olive oil
4 eggs
1 tsp. vanilla
2 and 1/2 cups white whole wheat flour
2 tsp. baking powder
1 tsp. baking soda
1/2 tsp. salt
1 tsp. cinnamon
1/2 tsp. nutmeg
1/2 tsp. ginger
1/8 tsp. cloves

Directions:
In a large mixing bowl, blend together the pumpkin, sugar, honey, oil, eggs, and vanilla. In a separate bowl, combine the dry ingredients, then add the dry ingredients, a little at a time, to the wet mixture. Pour batter into a greased 10x15 baking pan and bake at 350 for 20-25 minutes or until a toothpick inserted near the center comes out clean. After cooling, spread some cream cheese frosting over the bars. You can also shave some dark chocolate onto the frosting.

Cream Cheese Frosting
from the Bread Beckers, Inc.

Ingredients:
8 ounces cream cheese, softened
2 Tbsp. honey
2 tsp. vanilla

Directions:
In a small mixing bowl, whip together the cream cheese, honey, and vanilla. Spread on the pumpkin bars. This will make a thin layer. If you like an extra thick layer of frosting, double this recipe.

Friday, October 19, 2012

Homemade "Ramen Noodles"

There is nothing fancy about this post, or this recipe. It's literally one of the simplest things I have ever thrown together, but with the weather cooling off, and colds and other lovely illnesses bound to strike, I thought someone might find it helpful.

In the past, ramen noodles were the dish of choice in our home whenever someone was recovering from a stomach bug, had a cold, or for any other excuse. I can't, in good conscience, give them to my family anymore when they're under the weather (which, thankfully, is a lot less nowadays!). I want to give them something that's really easy on their stomach, but not filled with a lot of junk, especially when the goal is to get them well!

So, last summer, when one of my kids had a nasty virus and wanted something soft and bland to eat, I simply pulled some homemade chicken broth out of my freezer, warmed it up on the stove, and added some 100% whole wheat spaghetti noodles. I let them cook until they were soft, and that's it!

I brought her the bowl, not sure what to expect her reaction to be, and she loved it! Of course, homemade chicken noodle soup would've been a fantastic thing to give her, but truthfully, she still wasn't feeling very well and just wanted some noodles. I was thrilled to have found such an easy substitute for ramen noodles.

What comfort foods do you like to feed your kids when they are under the weather? Have you found any healthy alternatives? I'd love to hear about them! Please include your ideas in the comments below!

Wednesday, October 17, 2012

Taco Seasoning

I posted a recipe on Wednesday for wheat-free tortillas. If you're going to go to the trouble of making your own tortillas, which is totally worth it, don't wreck a delicious, healthy supper by using a processed packet of taco seasoning! Most of the time, these packets contain white sugar and/or bleached flour, along with other processed ingredients we're trying to avoid.

Making your own taco seasoning is a piece of cake. Instead of ripping open the packet, you simply pop open the top on a few spices and toss them in. My family has never been able to tell the difference, and I feel a lot better about what I'm serving them. I have a friend who likes to pull out all of her spices and make lots of little baggies of seasoning at one time so that when she's cooking, she just needs to dump the baggies of pre-mixed spices into her pan.

Homemade Taco Seasoningadapted from Maximized Living Nutrition Plans

Ingredients:
1 pound ground beef
2 Tbsp. chili powder
1/2 tsp. sea salt
2 tsp. cumin
1/2 tsp. onion powder
1/2 tsp. garlic powder
2 tsp. oregano
1/2 tsp. cayenne pepper
1/2-3/4 cup water

Directions:
Brown the ground beef over medium heat, then add the spices and water, and mix together. If there is a lot of fat after browning the beef, drain some of it first. Turn the heat to high until the water boils (this should happen very quickly), then turn down to medium and cook for an additional 3-5 minutes, until the mixture reaches your desired consistency.

Monday, October 15, 2012

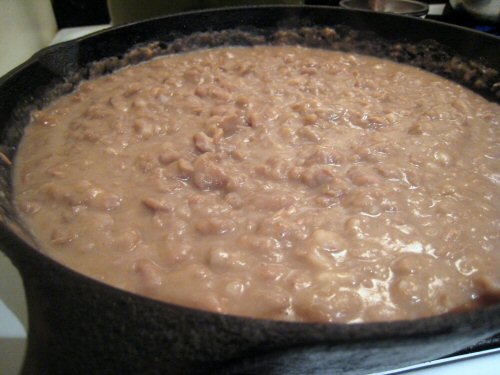
Slow Cooker Refried Beans

www.flickr.com, photo by ~


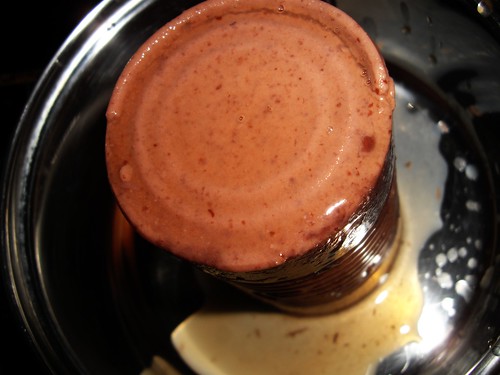
Have you ever checked the ingredients label on a can of refried beans? Most of them contain a lot more than you bargained for. You can certainly find refried beans that contain only beans and water, but not at every store, and you're going to pay a lot more for them. Since finding this recipe for homemade refried beans, I have not bought a single can of refried beans at the store.

www.flickr.com, photo by goodiesfirst

This is one of those fail-proof recipes. Let me list some reasons why I love these refried beans in comparison to canned:

1. They are so much cheaper. I even buy the organic  pinto beans (in bulk at Whole Foods) and still spend less.
2. They taste better. These refried beans remind me of the ones I used to eat at a little family-run Mexican place in Fort Worth.
3. They are better for you. You know exactly what's going in your mashed up beans and can avoid hydrogenated oils, sugars, and other ingredients you just plain don't need in refried beans.
4. My kids get to experience the process of making real food in their home. They're making the connection between hard pinto beans and the delicious, creamy refried beans they spread on their tortillas.

I have a giant slow cooker, and I often double this recipe and then freeze the refried beans in small and medium containers. I just pull them out and reheat them when we want burritos. Note: The amounts on the spices are approximations. Feel free to adjust according to your taste. I usually just shake them in without even measuring, and they still taste fabulous, every time. The only exception is that sometimes I need to add a little more salt after mixing them together.

Slow Cooker Refried Beans
adapted from 100 Days of Real Food

Ingredients:
2 cups dry pinto beans, rinsed and drained
2 tsp. onion powder
2 tsp. garlic powder
1 tsp. salt
1/2 tsp. black pepper
1 tsp. cumin
Approx. 6 cups of water

Directions:
Dump the beans into your slow cooker, then add the spices and water. Cook on high for 8 hours or overnight (your kitchen will smell fabulous!). Using a slotted spoon, transfer the beans to a food processor (using the "S" blade). Add a little of the water as well. Mix for a few seconds, and then add additional water until the beans get to your desired consistency.

Friday, October 12, 2012

Join 180 Chiro for Dinner!

DATE: Monday, October 15th

TIME:
6:00 pmWHERE:

 
 3021 Mallory Lane, Franklin, TN 37067
Check out Dr. Sweeney's Personal Invitation!

Join our sponsor, 180 Chiropractic and Wellness, for dinner, while learning new ways to maximize your implementation of the 5 Essentials into your life! This is an exciting opportunity to bring friends and family who need to hear the truth about health. The care we deliver in our clinics changes lives, and we want to reach as many people as possible.

Help us make a difference in the lives of the people who matter most to you.

Spots are limited, so please sign-up your loved ones for this amazing opportunity today!

Thank you for being part of our family at 180º Chiropractic & Wellness!


For more information, or to sign up, contact 180 Chiro at:
info@180chiro.com
615-595-9063

Wednesday, October 10, 2012

Tortillas with No Wheat

I regularly make my own whole wheat tortillas, but since we try to limit how much wheat we eat, sometimes I also make tortillas without any wheat. Instead of just using gluten-free flour, these tortillas have a completely different recipe. They don't taste the same as the tortillas we're all used to, but they're very good. They're actually a welcome change and add a lot of fun to taco night. They're not super strong, so you may want to consider eating them with a fork.

Wheat-Free Tortillas
adapted from Mark Sisson's Mark's Daily Apple

Ingredients:
1/4 cup plus 2 Tbsp. water
2 eggs
2 Tbsp. olive oil
1 tsp lime juice
2 Tbsp. coconut flour
1/4 tsp. baking powder
1/2 tsp. cumin
1/4 tsp. chili powder

Directions:
If you've ever made your own whole wheat tortillas, these are a breeze in comparison! Mix together the dry ingredients in one bowl, and the wet ingredients in another. Gradually add the dry ingredients to the wet, whisking. Add about 1/4 cup of batter to a hot skillet coated with olive oil (keep it just below medium to avoid the oil overheating and smoking). Tilt the pan so that the batter spreads out. Cook the tortilla uncovered for 1 minute, then cover the pan for 1 minute. Flip the tortilla and cook uncovered for 2 more minutes. That's it!

Monday, October 8, 2012

Muffin Monday: Pumpkin Bread and Muffins

www.flickr.com, photo by rox sm


When I was in college, I spent about 8 months in Ketchikan, Alaska, living with Pam and Harry Gibson. They are such a sweet family, and I still miss them. Harry regularly made banana bread and pumpkin bread, and it was delicious! We would come home from church and gorge ourselves on it (or at least, I did. Perhaps the bread disappeared faster when I was living there!).

I still love making and eating pumpkin flavored goodies this time of year! There's just something invigorating about dropping temperatures, crisp mornings, colorful trees, and the smell of pumpkin baking. My recipe isn't Harry's, but it brings back fond memories of time spent at the Gibson's, and of Harry's amazing pumpkin bread!

There's nothing like cooking up your own pumpkin and using its puree for your pumpkin goodies, but sometimes we buy the canned pumpkin as well. If you do this, just check the ingredients. There should be nothing added--just pumpkin.


Pumpkin Breadadapted from 100 Days of Real Food

Ingredients:
1 and 1/2 cups white whole wheat flour
1 and 1/2 tsp. cinnamon
1 tsp. ground ginger
1/2 tsp. nutmeg
1/8 tsp. cloves
1 tsp. baking soda
1/4 tsp. baking powder
1/2 tsp. salt
2 eggs
1/2 cup grapeseed or olive oil
1/2 cup honey
1/2 tsp. vanilla
1 cup pumpkin puree

Directions:
Mix all of the dry ingredients together in a large bowl. Set aside. Mix all of the wet ingredients together in another bowl. Gradually, add the dry ingredients into the wet ingredients and combine. Do not overmix. Pour into a greased loaf pan (I grease mine with olive oil) and bake at 350 for about 40 minutes. If you'd rather make muffins, pour the batter into 12 muffin cups and bake at 350 for about 20 minutes.

Friday, September 28, 2012

A Crust for Many Occasions

On her blog, 100 Days of Real Food, Lisa Leake has a pizza pocket recipe that my family absolutely loves. We eat pizza pockets for lunch almost every week. You can check out that recipe here.

I've also discovered that this wonderful pizza pocket crust recipe can be used as a substitute for a lot of other types of crusts. This was a wonderful discovery, and opened up a lot of new recipe possibilities for us. It even made some of our old recipes possible again.

Some uses for this crust:

1. Thin pizza crust. If you bake the crust for a few minutes at 425 before adding the toppings, you'll get a crispier crust. If you add toppings first and then bake, your crust will be softer.

2. Crescent rolls. I have several recipes that call for crescent rolls to be the outer crust. Instead of buying a can of these rolls, I mix up a recipe of the pizza pocket crust and roll it out thin.

3. Pot pies. I love making pot pie recipes, or any recipe that requires a crust on top. This pizza pocket recipe makes a nice, thick crust. Roll it out pretty thin, because it will puff up when baking.

4. Pigs in a blanket. I really miss this breakfast, but I can re-create it (sort of!) by rolling out this crust, cutting it into small pieces, and then rolling up small slices of Applegate hot dogs in it.

Hold onto this crust recipe and use it the next time you come across a recipe that call for crescent rolls, or another unhealthy crust!

Pizza Pocket Crust

Ingredients:
1 cup warm water
2 tsp. quick rise yeast
1 tsp. salt
2 Tbsp. olive oil
3 cups 100% whole wheat flour

Directions:
Add the yeast to the water, stir briefly, and let set for a few minutes. Mix in the salt and olive oil, then add the flour. You can mix this by hand pretty easily, but you can also pour the ingredients into your food processor when it's time to add the flour. Use the "s" blade to mix up for a few seconds, then place in a large greased bowl. Cover with a towel or plastic wrap and let sit for at least 30 minutes. If making pizza crust, let rise until double. For some other crusts, you may want to just let it rise a little, then go ahead and make your crust. When I make the pizza pockets, I only let it rise a little.

Wednesday, September 26, 2012

Finding Recipes

So, where does a family go to find quality recipes that don't use a bunch of refined ingredients, harmful oils, and sugars? Today, I want to share with you my list of "go-to" places where I search to find great recipes for our families.

1. Maximized Living blog: I don't like everything on here--some recipes, I don't like at all, but I have definitely found some jewels that have become staples around here.

2. Mark's Daily Apple: There is a plethora of information on this website! I don't agree with all of the philosophies and beliefs of the author, but he does have some great recipes and information.

3. 100 Days of Real Food: If you're going gluten free, this is probably not the website for you--she uses a lot of 100% whole wheat flour in her recipes, but she has found a lot of homemade alternatives to food we used to rely on buying packaged. She also has a lot of kid-friendly recipes, and she avoids refined foods and bad oils.

4. Simply Sugar and Gluten Free: Simply said. Check it out!

5. Healing Cuisine with Elise: I just discovered this website. Great recipes!

In addition to these great websites, I've found some great cookbooks that have helped a ton:

Simply Sugar and Gluten Free by Amy Green

The Bread Beckers, Inc. (available at www.breadbeckers.com)

Maximized Living Nutrition Plans (available at 180 Chiro or other Maximized Living providers)

Cruise Ship or Nursing Home? (also available at 180 Chiro or other Maximized Living providers)

In addition to these great resources, I've also gained several great recipes from 180 Chiro's Recipe Nights. These are free events where you can sample several recipes, gain valuable information about making better nutritional choices, and take home some new recipes to try!

The next Recipe Night is Monday, Oct. 1, 6:00 p.m. at 180 Chiro (4091 Mallory Lane, Suite 114, Franklin, TN). My family will be there, and I hope you will join us for some delicious food and beneficial information!

Please contact 180 Chiro at 615-595-9063 or info@180chiro.com for more information, or to sign up!

Monday, September 24, 2012

An Emotional Journey

So, how would a family who's used to eating boxed lasagna, Kraft mac and cheese, and all things packaged, make the huge transition to eating real food--foods that help your body heal, rather than make it more susceptible to illness?

It's an overwhelming task! I specifically remember the mental and emotional journey I made on this process:

1. Are you kidding me? When Dale first came home with the book, Cruise Ship or Nursing Home, I immediately, without even pausing, said, No Way. Heck, no. Not in your wildest dreams, no thank you, NO. I have enough on my plate without trying to figure out a whole new way of eating, I don't want to give up these foods, our budget is already tight, etc. etc. etc.

2. Unfortunately, this makes way too much sense to ignore. Somehow, and I'm still not sure how, Dale convinced me to go to one of the free events at 180 Chiropractic and Wellness. While listening to Dr. Sweeney and Dr. Gebhardt, I realized that everything they said made sense. I still did not want to do this, but I was starting to believe that maybe they weren't nuts, at least!

3. We have to do this. Just to be fair, I sat down and read the book. Honestly, I was looking for holes in their theories. I wanted to be able to point out why they were wrong and how crazy this whole Maximized Living food program was. As I read, however, I became more and more convinced that they were right. Once I had the information, I couldn't not  change.

4. Frustration. Have you been reading labels? Remember the first time you went into the store, armed with your list of sugars and bad oils to avoid? The list really isn't that long, but those enemy ingredients are stuffed into nearly everything! No matter what I picked up, it was packed with sugars and hydrogenated oils. The list of what we could eat dropped dramatically. Surely, these Maximized Living people were expecting too much.

5. Fear. After trying to eat through most of the junk in our pantry before giving it up, (after all, we didn't want to be wasteful!) we finally cleaned out the rest, leaving only our new, acceptable foods in there. Terror churned through my stomach as I would open our cupboards and pantry and see a bag of flaxseed, several bags of nuts, and some tomato paste. The emptiness was terrifying. Were we really doing the right thing? Would we have enough to eat? (The refrigerator, on the other hand, was loaded down with fresh, natural food.)

6. Anger. Once we accepted that the Maximized Living plan wasn't insanity, I became angry at the way the American people have been duped. It took an enormous amount of effort to free ourselves from the traditional, acceptable American cuisine, but up until Dale walked through the doors of 180 Chiro, we had been clueless. Many, many people were still out there, buying foods that appear healthy, and yet are loaded down with hidden sugars and harmful oils. People are still buying into the "low fat" options, and busy families with tight budgets aren't presented with healthy options. Everything processed and packaged is harmful to them, and no one is telling them!

7. Acceptance. Finally, I had to realize that horrible food choices surround us--that's the way it's going to be. All we can do is continue to make good choices, avoid the bad ones, and share with others, through this blog, through 180 Chiro's free classes, and through word of mouth, that making healthier choices is difficult, but worth it.

Can you relate? What emotions have you experienced? Include them in the comments below!

Friday, September 21, 2012

Whole Foods Tour

I'm a cheapskate, um, I mean, value shopper. If given the choice between a less expensive item or a higher quality one, I will choose cheap over quality almost every time. This is not always the best choice and has resulted in many poor purchases over the years, but nevertheless, it's the way I roll. I am learning, albeit slowly, that sometimes cheap isn't better.

Take, for example, grocery stores. I don't like Wal Mart. Never have. However, I shop there all the time because they tend to have the cheapest prices. A little over a year ago, I had never set foot in Whole Foods, or any other healthy store, because I mistakenly believed they were too expensive, and that my "Great Value" choices were always the way to go.

That's before I started reading labels. And avoiding sugar. After attending a nutrition class at 180 Chiropractic and Wellness, my husband and I took a deep breath, and ventured inside the world of Whole Foods for the first time.

The first thing I noticed was that it even smelled different than regular grocery stores! As we looked around, we discovered that some items were higher priced. We could buy the exact same thing at Wal Mart or another grocery store for less. We passed by those items. However, Whole Foods had something the other stores didn't have: healthy, organic, and natural store brand items! Their store brand items were quite a bit cheaper than the name brand choices at other stores. Shopping at Whole Foods actually saved us quite a bit of money on several items!

I regularly shop at Whole Foods now, but I always compare prices. I'm not going to pay extra for an item that I can get at Wal Mart, but I love saving money on their bulk grains, beans, and spices, as well as taking advantage of their store brand items.

Whole Foods is not paying me a cent to say this about them: it's just my opinion. I do want to encourage you, if you are trying to make healthier choices, but are afraid that shopping at Whole Foods will break the bank, to just take a stroll through there. Read the labels. Compare ingredients. Compare prices. Check out the bulk section.

If you feel overwhelmed by this prospect, consider tagging along with 180 Chiro Monday evening as they take a tour through Whole Foods. Ask questions, get some directions, check out your options. 

If you're interested in taking this free tour of the Franklin, TN Whole Foods store next Monday, Sept. 24th at 6:00 p.m., please contact 180 Chiro at 615-595-9063 or info@180chiro.com.

Wednesday, September 19, 2012

Exercise Accountability

Most worthwhile habits are tough to maintain. They require discipline, hard work, and accountability. I'd love to believe that if no one was watching, if no one was holding me accountable, that I'd just be a healthy machine...but I'm way too weak. It's already so easy to slip back into old habits, one little bit at a time. And if no one was looking? Even easier.

Who do you have that will hold you accountable? Who will honestly ask you how many "cheats" you've had this week, or how often you've exercised? Can you name someone? If not, find someone! Ask a family member to go on this journey with you, or give a friend or co-worker permission to ask the tough questions.

One easy way to stay accountable with exercise is to have a group who counts on you to show up at a certain place and time to exercise together. You may already have accountability in place, but if you don't, and you live in middle Tennessee, consider surge training with the awesome staff at 180 Chiro! They offer free burst training classes twice a week. Not only do these classes help you to succeed at exercise, they also help you with accountability!

Consider coming to these free classes for support, encouragement, and accountability. Oh, and of course, for better health!

WHEN: Every Wednesday at 11:40 a.m. and every Saturday at 8:30 a.m.
WHERE: 180 Chiropractic and Wellness
                 4091 Mallory Lane, Suite 114
                 Franklin, TN 37067
For more information, or to sign up, contact 180 Chiro at 615-595-9063 or info@180chiro.com

Monday, September 17, 2012

What's in your vitamins?

www.flickr.com, photo by Shannon Kringen


A little while back, I posted about our need for iron. It was actually through my search to find children's multi vitamins that actually included iron that I started looking more closely at the ingredient labels on vitamins. I've been frustrated to find that some of the vitamins we take to enhance our health also contain ingredients which tear it down.

Would you like some aspartame in your kids' multivitamins? How about artificial dyes, made from petroleum, or added sugar or high fructose corn syrup?

What about your vitamin? When the manufacturer claims it's specially designed to enhance your energy, how would you like to find out that the only difference between the "high energy" vitamin, and the regular, is that the "high energy" vitamin contains caffeine?

Just like we read the ingredient labels on the food we buy, we must also carefully read the ingredient labels on our vitamins. I sincerely hope that when you pull your vitamins out of the cabinet and check the label, that you breathe a sigh of relief because you don't find any controversial ingredients in them. If not, however, be encouraged that it is fairly easy to find reasonably priced vitamins that don't contain a bunch of junk.

Check out the Vitamins page on www.foodfacts.com for lists of ingredients in over 356 kinds of vitamins. You can also go to your local health food or alternative health store to read ingredients and compare prices. Personally, we love to shop at The Vitamin Shoppe. Their prices are competitive, the employees are helpful, and they constantly offer coupons. We even get gift certificates from time to time to use toward future purchases. If you don't have a Vitamin Shoppe near you, you can also check their website. They offer free shipping on all orders over $25, which is a great bonus. Even though we have a Vitamin Shoppe nearby, sometimes we still order things online, simply for the convenience (translated: sometimes we're lazy!).

I am a huge cheapskate, though, and so I always compare the prices at Vitamin Shoppe with other online retailers, such as Amazon. Once I know what I want, I order from the retailer with the best deal. Always. We have saved a ton of money by shopping around and comparing prices. We do buy the bulk of our vitamins and supplements online, because the deals we get are SO much cheaper.

For example, I found a 25-count bottle of the vitamins I wanted at a local retailer for $25. Gulp! There's no way I can afford that! So, I shopped around and found the EXACT same vitamins, in a 75-count bottle, for $18 online. I bought 2 bottles and got free shipping.

Buying better vitamins for your family doesn't have to cost a bundle. Just read the ingredients and shop around for the best deals. And by "shop around," I mostly mean check online retailers, which only takes a few minutes.

Friday, September 14, 2012

Total Food Makeover!

You probably know you want to eat better, but perhaps it seems too complicated, overwhelming, or perhaps you just don't think the foods will be budget-friendly.

180 Chiropractic and Wellness would like to help make healthier, more natural foods a reality for you. This Monday, they are offering a FREE total food makeover! Come and learn some valuable information about your food, ask questions, and gain support for your endeavor.

Thousands of people have transformed the way they look at food, the way they shop, the way they eat, and the way they approach health. You won't be sorry you came. Call 180 Chiro today to tell them who you are bringing with you!


WHEN: 6:00 p.m. Monday, Sept. 17, 2012
WHERE: 180 Chiro
               4091 Mallory Lane, Suite 114
               Franklin, TN 37067

To sign up, or to get more information, contact 180 Chiro at 615-595-9063 or info@180chiro.com

Wednesday, September 12, 2012

Yeast Rolls

In years past, I've been a big fan of Sister Schubert's frozen yeast rolls. No holiday meal was complete without them, and we also used them as buns when we made our own mini-burgers at home. Anyone else out there love these rolls?

I already knew I couldn't serve these rolls any more simply because of the white flour. What I didn't realize, though, until I looked them up on foodfacts.com, was that they also contain 3 kinds of oils we're trying to avoid, including hydrogenated and partially hydrogenated oils. (Translation? Trans fats.) Of course, on top of the oils are the ingredients of white flour and white sugar. Too bad!

However, a friend of mine shared the following recipe for homemade yeast rolls, which, in my opinion are every bit as delicious as Sister Schubert's, and they don't contain any of those harmful ingredients! They freeze really well, too, so when you make this giant batch, you can put some in the freezer (freeze them separately on a cookie sheet first, then put them in a freezer baggie together) and pull them out to use as needed.

I'll be honest--I don't serve yeast rolls alongside Sunday dinner. I use them for burger buns, lunch sandwiches, and things like that. When Thanksgiving rolls around, however, I do believe they'll be showing up this year instead of Sister Schubert!

Yeast Rolls

adapted from The Bread Beckers, Inc. Bread & Rolls recipe

Ingredients:
1 1/2 cups hot water
1 cup cold milk
4 and 1/2 tsp. quick rise yeast
3 eggs
1/3 cup olive or grapeseed oil
1/3 cup honey
6 to 7 and 1/4 cups white whole wheat flour (I use King Arthur)
1 Tbsp. sea salt

Directions:
Mix together the water and milk. The resulting lukewarm temperature will activate the yeast, but not be so hot that it kills it. Add the yeast, stir briefly with a whisk, and allow to set for a few minutes. Add the eggs, oil, and honey, and mix well. Add the flour, one cup at a time, and mix after adding each cup. I try to stick to about 6 cups at this point, so I can add more later, but if your dough is extremely sticky or runny, feel free to add a little extra.

When the dough is mixed well, set it in a large bowl sprayed with olive oil or dusted with flour, and cover with a towel. Let the dough rise until it is about double. Turn it out onto a floured surface, adding a little flour at a time to avoid excessive stickiness as you knead the dough (dough will be somewhat sticky.)

To make 30 full sized yeast rolls (about the size of a burger bun), divide the dough into three parts. Cut each third in half, then divide each half into 5 equal pieces. Roll each piece into a ball (do not smash down or your rolls will be very flat), or roll into a rope and tie the rope into a knot. Place the rolls on greased cookie sheets and allow to rise until about double (about an hour or so). Bake at 350 for about 15-20 min.

Note: If you'd rather make mini rolls, divide each roll in half before placing on the baking sheets. Reduce baking time to 10-15 min. or until slightly browned.

For an extra buttery taste, spread melted butter on the tops of the rolls before serving.

Monday, September 10, 2012

Triangle Push Ups

Three mornings a week, Dr. Fred Roberto tortures (um, I mean, trains) me through his Max T3 exercise videos. I do these exercises in my garage, and it takes me 12 minutes. I know 12 minutes doesn't sound like much, but on some days, walking back up the stairs into my kitchen is an effort after those 12 minutes!

In past entries, I've stated that surge training takes 9 minutes. That is true. However, the Max T3 videos step it up even more by giving you 12 minute workouts with no 2 minute breaks. That's right--it's 20 seconds of full on, hard-as-you-can-go exercise, then 20 seconds of break, repeated, with no additional breaks, for 12 minutes.

Triangle, or diamond, push ups, are one of the exercises in this workout. In the following video, Dr. Roberto demonstrates this exercise. If you've been trying surge training, this would be a great addition to your workout!

Friday, September 7, 2012

Lasagne

www.flickr.com, photo by Elin B.


Like many other people, I went through a phase of buying frozen lasagne in a box. It was so convenient. Besides, when it was on sale, it was a decent price. However, to be honest, I always kind of wondered what was in the sauce, especially when the box announced, "Flavored with meat." What kind of meat? What did that mean?

Homemade lasagne is more work, but it's not a ton of work, and--let's face it--anything would be more work than pulling a pre-made meal out of a box and tossing it in the oven.

Just in case you're still thinking you don't want to go to all that work, and wondering if it would really make a difference, let me show you something.

FoodFacts.com gives Stouffer's Lasagna with Meat Sauce the grade "F" for the following reasons:
Contains controversial ingredients--6 to be exact, including artificial coloring and undisclosed "Flavoring"
High in sodium
Contains added sugars

But wait! They also make a lasagna called "Stouffer's Farmer's Harvest Lasagna"! That sounds healthy, right? It also earned an "F" from foodfacts.com. Their "Farmer's Harvest Vegetable Lasagna" barely passed with a "D-".

Making your own lasagne allows you to control the ingredients you feed your family. Feel free to change some of mine, if that's what you like better. No more wondering what's in that "meat sauce," because you made it yourself.

This recipe is from a church cookbook.

Lasagne

Ingredients:

Meat Sauce:
1 and 1/2 lbs. ground beef
1 Tbsp. basil
1/2 tsp. sea salt
1 lb. can tomatoes
12 oz. can tomato paste

Cheese Mixture:
2 eggs, beaten
1 large carton cottage cheese (skip the low-fat!)
1/2 cup grated Parmesan cheese
2 Tbsp. parsley flakes
1/2 tsp. sea salt
1/2 tsp. pepper

You will also need:
1 lb. mozzarella cheese
8 Whole wheat (or brown rice) lasagne noodles

Directions:
Brown and drain the ground beef. Add the other "meat sauce" ingredients and simmer for 30 minutes. Meanwhile, mix all of the "cheese mixture" ingredients together in a medium bowl and set aside. Cook the lasagne noodles in a large saucepan for 1/2 the time, according to the package directions. Drain and rinse in cold water.

Using a 9x13 pan, layer half of everything in this order: noodles, cheese mixture, mozzarella cheese (slice or shred first), and meat sauce. Repeat with the remaining ingredients. Bake at 375 for 30 minutes.

Note: If you prepare the lasagne ahead of time and store it in the refrigerator, increase the baking time. It should cook for at least 45 minutes.

Wednesday, September 5, 2012

Chicken Parmigiana

www.flickr.com, photo by balise42


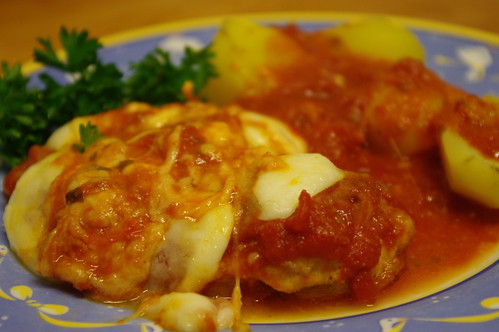
I've been making this recipe, which I got out of my Fix It and Forget It slow cooker cookbook, for a long time. To make this recipe better for you, I just added my own pizza sauce and chicken breading, and changed up the noodles a little bit. It's very easy to make--it requires a little bit of time in the morning (or the night before!), 30 minutes or less--then it cooks in your slow cooker all day long and you can finish up your day with a delicious meal!

Chicken Parmigiana

Ingredients:
1 egg
1 tsp. sea salt
1/4 tsp. pepper
6 boneless, skinless chicken breast halves (cut your chicken breasts in half or buy chicken strips with a thinner cut)
1 cup homemade bread crumbs*
2-4 Tbsp. butter
1-2 recipes of pizza sauce, depending on how much sauce you like.**
1/2-1 cup mozzarella cheese
1/4 cup Parmesan cheese
Brown rice or whole wheat spaghetti noodles (if desired)

Directions:
Beat egg, salt, and pepper together. Set the egg mixture in a shallow bowl or pie plate, and pour the bread crumbs into another shallow bowl or pie plate. Set the butter in a skillet, then turn the skillet to medium and let the butter melt while you dip the chicken breasts into the egg mixture, then the bread crumbs. You may have to firmly press the bread crumbs to the chicken.
After dipping the chicken, brown the outsides of it in the melted butter, then lay the chicken in the slow cooker. Pour pizza sauce over the chicken. Cover, and cook for 6-8 hours.
Sprinkle the mozzarella and Parmesan cheese over the chicken and sauce, cover, and cook for a few more minutes until it melts. While the cheese is melting, prepare brown rice or whole wheat spaghetti noodles.
Lay the cooked chicken over the rice or noodles, then pour a little sauce over it.
We've also substituted vegetables, and even spinach, for the rice/noodles. It's actually quite tasty!

*Homemade Bread Crumbs:
Toast 2 slices of Ezekiel bread. Set the toasted bread in a food processor, then sprinkle about 1 tsp. italian seasoning over them. Run the food processor for a few seconds to get bread crumbs.

**Pizza Sauce:
If you can find a jar of pizza sauce that doesn't include harmful oils or sugar, that would be fine to use for this recipe. I just make my own, which only takes a few minutes.

Ingredients:
6 ounce can of tomato paste
1/2-1 tsp. garlic powder
1/2-1 tsp. onion powder
1 tsp. parsley
1/2 tsp. sea salt
1/4 tsp. pepper
1/2 tsp. oregano
2 Tbsp. Parmesan cheese
(these amounts are approximate. Season to taste.)

Scrape the tomato paste into a small saucepan, then add 2 more cans of water. Add all of the spices, then heat on medium until you start to see bubbles.

Monday, September 3, 2012

Free Burst Training Class!


I've got 3 kids and a busy life, and the thought of gathering everybody up and getting them to the gym and into their respective childcare situations, then fighting everybody else for the weights and machines in the wellness room, pretty much kept me away. I actually did enjoy working out there (sometimes!) but the hassle of it was usually more trouble than it was worth.

When our family decided to give Maximized Living a try, however, we were pleasantly surprised to learn that we could actually exercise in our own garage, with nothing more than a few hand weights for equipment. Their burst training program takes much less time than traditional exercise, but if you do it right, you will get just as tired and experience great results!

If you live in the Nashville area, the staff at 180 Chiropractic and Wellness would love to give you a free class on burst training. They will help you understand the importance of, and results of, this fantastic type of exercise, along with giving some demonstrations and letting you try it out!

This free class will be held on Saturday, Sept. 8 at 7:30 a.m. and will only last for about 30 minutes, so you can get on with your weekend. Check out the details:

What: FREE class on burst training

When: Sat. Sept. 8, 7:30 a.m.

Where: 180 Chiropractic and Wellness
              4091 Mallory Lane, Suite 114
              Franklin, TN 37067

For more information, or to sign up, contact 180 Chiro at: 615-595-9063, or info@180chiro.com

Friday, August 31, 2012

Brown Bag It

www.flick.com, photo by Jeffrey Beall


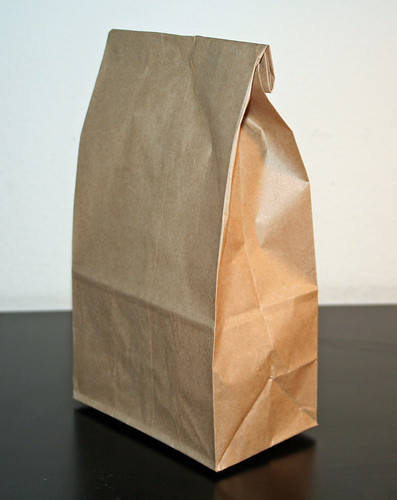
This blog post is going to be simple and obvious, but it may be the reminder (and motivation) some of us need. We're all busy, right? It's so much easier to go through the drive through at our favorite fast food restaurant at lunch time, or to send lunch money with our kids, than it is to take the time to pack our own lunches, but the benefits of packing healthy lunches for your family far outweigh the ease of buying what someone else has made. Here are some (obvious) benefits to bringing the brown bag:

You Save Money: I get asked all the time, "How do you afford buying all that healthy food?" Well, one easy answer is, "We almost never go out to eat." The amount of money we would spend taking our whole family out to eat two times per month easily covers the extra we spend on healthier foods. Let's face it: It costs less to pack your own lunch than it does to buy it. So, do we ever buy lunch? Well, of course we do, but not very often. I'd much rather spend that extra money on real food.

You Control the Ingredients: Even if you order a salad at a restaurant, are you really controlling the ingredients? How do you know they even washed the pesticide-laden produce? That grilled chicken you ordered--what did they inject into it, or brush over it? You don't know. Even some of my favorite restaurants, that I would consider healthier than the rest, add a lot of additives, sugars, and other disgusting things to their food. Of course they do! They're not in the health food business. They're in the "taste good" business.

You Get to Include the Food Groups (for real): When you pack a well-balanced lunch for your kids, you're probably not counting tomato paste as a vegetable, and the fruit you give them can be fresh, not dumped out of a can and enhanced with corn syrup.

You Can Limit Sugar: Want your kids to be able to concentrate better and do better in school? Want to avoid that 2:00 slump for yourself? Don't eat a lunch that's full of sugar! Hopefully, you wouldn't pack a lunch full of candy bars and Pop-Tarts, because the sugar content there is obvious, but a lot of other foods are full of hidden sugars as well. Peanut butter and jelly sandwich? Look at the ingredients in the bread, the peanut butter, and the jelly. Sugar, sugar, sugar, unless you have taken the time to specifically purchase each of these without added sugar. You can do it, actually, and it's not that hard (or expensive!) You just have to read the ingredients.
I can guarantee you, however, that if someone else is making that lunch, they aren't going to buy healthy varieties. You're not going to get fruit packed in fruit juice or no sugar added peanut butter. If you want to limit the sugar, you've got to pack it yourself.

Is packing your own lunches more work? Of course, but making healthier choices for your family requires a little effort. The benefits far outweigh the few minutes it takes to give your family the best each day.

Wednesday, August 29, 2012

Get Some Iron

www.flickr.com, photo by JD Hancock


We need iron. It helps us fight against disease, helps carry oxygen throughout our bodies, improves our liver function, protects against the actions of free radicals, and more.

Many of us, however, especially if we're women, can run low on iron, which is called anemia. According to www.healthy-vitamin-choice.com, the following are some symptoms of insufficient iron:

Iron deficiency can lead to anaemia when the iron stores in the body become depleted and hemoglobin synthesis is inhibited.
Symptoms and signs of anaemia include:
  • feeling tired and weak,
  • lacking stamina and decreased work and school performance,
  • slow cognitive and social development during childhood,
  • difficulty in maintaining body temperature,
  • decreased immune function, which increases susceptibility to infection,
  • breathlessness,
  • headaches,
  • insomnia,
  • loss of appetite, and
  • pallor.
All the above are associated with decreased oxygen supply to tissues and organs. Iron also plays an important role in the immune system, people with low iron levels having lowered resistance to infection.

I don't know about you, but I want to get enough iron so my body can function better! Here are some tips to help you get enough iron, and to help your body absorb and use the iron it gets.

Eat Iron-Rich Foods: red meat, egg yolks, dark, leafy greens like spinach, prunes, raisins, artichokes, beans, and lentils are all excellent sources of iron.

Take a vitamin: Make sure the vitamin you take actually gives you iron. Many do not. I wouldn't feed my kids those "gummy" vitamins anyway, because of all the junk they typically contain, but gummy vitamins almost always do not provide iron. Read the label.

Cook in a cast iron skillet: The iron from your skillet leaches into your food, upping the iron content of anything you cook in it.

Watch what you pair with your iron intake: Ok, it's story time. When my kids were really little, they struggled with low iron. I gave them a multi vitamin with extra iron, but it still didn't help. Finally, our nurse asked me what I was giving my kids to drink with their vitamins. I had been giving them milk. Big mistake.  Apparently, what you drink when you take in iron can dramatically affect how well your body absorbs the iron. Orange juice is the best. If you drink orange juice with your vitamin, it will enhance the way your body absorbs the iron. Water is pretty much neutral, but milk can actually prohibit your body's ability to absorb the iron you're taking in. (The same is true of coffee and tea.) I'm certainly not telling you to stop drinking milk, but if you take a multi vitamin with iron, try drinking orange juice or water with it, and leave the milk drinking for another meal.

What tips do you have about increasing iron? I'd love to hear them! Please share in the comments below.

Monday, August 27, 2012

Chocolate Chip Sour Cream Muffins

www.flickr.com, photo by Nicola since 1972


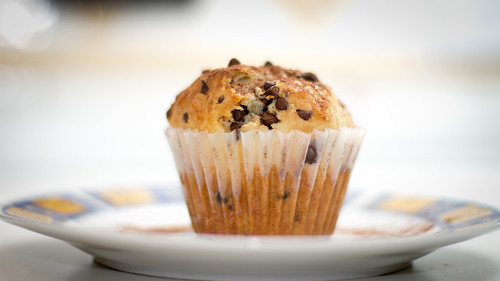
It's Monday, and at the Keys' house, that means it's...Muffin Monday! So, today, I'm going to share another muffin recipe with you. This recipe is from Taste of Home, and I only had to make very minor changes in order to make it less refined. As I've mentioned before, yes, it does have chocolate chips in it, and yes, they do have some sugar in them. Feel free to use carob chips, if you prefer, or purchase a bar of very dark chocolate in the "health" section of your grocery store and break it into chunks, if you want. I simply buy the darkest chocolate chips I can find, and I use them sparingly. Don't forget to check the ingredients. I compared the Ghirardelli dark chocolate chips with the other brands at my local store, and the ingredients were quite different. Some of the other options had a lot more "junk" in them than the Ghirardelli.

One other side note: please check the ingredients of your ingredients! Make sure your vanilla doesn't have added corn syrup, your baking powder is aluminum free, and that you don't buy the reduced fat dairy products. Starting with ingredients that don't contain extra, unwanted ingredients will get you off to a better start.

Anyway, on to the recipe!

Sour Cream Chocolate Chip Muffins

Ingredients:
1 1/2 cups white whole wheat flour
2/3 cup sucanat*
3/4 tsp. baking powder
3/4 tsp. baking soda
1/4 tsp. sea salt
1 egg
8 ounces sour cream (full fat, please!)
5 Tbsp. butter, melted
1 tsp. vanilla
3/4 cup chocolate chips

Directions:
Mix the dry ingredients together in a bowl. In a separate bowl, mix togethr the egg, sour cream, butter, and vanilla. Mix the wet ingredients into the dry until just moistened. Do not overmix. Fold in chocolate chips.

Grease a muffin tin with olive oil, and fill each cup 1/2-3/4 full. You will get 12 muffins. Bake at 350 for 20-25 minutes. They will bounce back to the touch when they are done. Cool for 5 minutes before eating.

*I've been using sucanat lately as a sweetener. I can find it in the bulk section of Whole Foods for a lot less money than I was spending on coconut palm sugar. Coconut palm sugar is also wonderful, however, and would work fine in this recipe as well.

Wednesday, August 22, 2012

Cheesy Chicken...Revisited

A while back, I wrote a post about one of our family's favorite recipes, Cheesy Chicken. In this post, I tried to explain why I still used chicken boullion cubes in this recipe. I had looked at ways to make your own boullion, and that wasn't something I was willing to do at the time.

However, after publishing the post, I started to feel guilty. Why, exactly, was I still using an ingredient like boullion cubes, full of junk my family is trying to avoid, in a recipe we eat quite often? I decided there must be a better way to make this dish without going to all the trouble of boiling down and freezing broth to make homemade boullion.

It was so easy! The original recipe calls for 2 cups of water, plus 3 crushed boullion cubes. Instead, I just substituted about 1/2 cup of the milk with homemade chicken broth, and added some additional salt. That's it! The recipe still tastes great. Check out the "even less refined, new and improved" cheesy chicken recipe below!

Cheesy Chicken
Ingredients:
1/4 cup butter
1/4 cup whole wheat flour
1 and 1/2 cups whole milk
1/2 cup chicken broth1-2 tsp. salt (to taste)

2 cups cooked chicken, shredded
Cheese

Directions:
Melt butter in a large skillet, then stir in the flour. Gradually add milk, broth, and salt, and whisk. Continue stirring over medium heat, until the mixture thickens and begins to boil. Add chicken and cook until heated through.
Serve over brown rice, wild rice, or faux-tatoes, and sprinkle cheese on top. The original recipe calls for cheddar, but unless you can find organic or raw cheddar that hasn't been colored yellow, I recommend Monterey Jack or another non-yellow cheese

Monday, August 20, 2012

Webinar on the Dangers of the Flu Shot

Every year, we see announcements, posters, and other tactics that try to convince us we need to get our annual flu shots, but are they necessary? How much do they help? Why would any sane person just decide not to take this precaution?

If you're interested in learning more about the dangers of getting the flu shot, check out Maximized Living's webinar on the flu shot!

When: Tuesday, Aug. 21, 2012, 7:00 p.m.

Where: Online

To register and receive the link for this important event, contact:

180 Chiropractic and Wellness: 615-595-9063 or info@180chiro.com

Wednesday, August 15, 2012

When You Know You've Really Changed...

Recently, I had a week where I kind of fell off the wagon, so to speak. Although I still cooked unrefined, real food at home, our family had way more "cheats" than normal, I didn't surge train all week, and I stayed up too late and got up too early several days in a row. Do you see where this is going?

Crash and burn.

I'm not even going to tell you I had a great time. After each processed, refined meal or snack, my body felt sluggish and gross. I couldn't think as clearly. My energy plummetted and I found myself increasingly cranky.

At the end of the week, my husband and I took our kids to the park to play. While we were there, my 8 year old spied a walking trail and asked where it went. Normally, I would've jumped at the chance to explore it with her. Instead, I lazily sat on the bench and had to tell her I was too tired to walk the trail with her.

I looked at my husband. "This week proves to me how much we've changed," I told him. "In the past, I would've made excuses, like, 'I'll go back to eating healthy on Monday,' so I could enjoy more time eating junk food. But now...I don't want to eat any more of it." We were all so relieved to know that supper that night would be our own homemade pizza.

A few hours later, I needed to get a few things at the grocery store. As my cart filled up with coconut milk, Ezekiel bread, and organic produce, it felt familiar and comforting to me, and I realized once again how much we have changed. I remembered the first few times I filled my cart up with that "weird, healthy stuff" and how odd it felt, how I longed to buy the junk, and how scary it actually was. This time, I walked right past the Oreos, ice cream, and chips. They didn't "call out" to me at all, Truthfully, I didn't even notice them.

I wanted to write this post to encourage you if you are still struggling with embracing a healthier lifestyle. Perhaps the junk food still calls out way too loudly when you're at the grocery store, or those doughnuts in the break room at work seem to just jump into your hand.

I want to write to tell you that this is possible, and that this is worth it. No dessert tastes as good as having the energy to explore those trails at the park with my kids feels. No fast food value meal tastes as good as waking up in the morning energized and ready to tackle my day feels. No packaged, processed meal is as convenient as knowing I have excess energy to accomplish all the tasks a busy mom has to accomplish in a day.

If you're struggling to make healthier choices, don't give up. Feeling good is only one of the perks, but in this mom's mind, it's a huge one. Today, make the choice to put down the sugar so you have more energy for those important people you love.

Monday, August 13, 2012

Oatmeal Chocolate Chip Nut Butter Cookies

I love these cookies. I love that they're flourless, filled with protein, and my kids will actually eat them. That may have something to do with the chocolate chips... As I've mentioned before, we make allowances for chocolate chips sometimes. We buy the Ghirardelli dark chocolate chips. They're the darkest we can find, and their list of ingredients, although definitely less than perfect, is a lot less scary than the lists on some of the other brands.

Oatmeal Chocolate Chip Nut Butter Cookies

Ingredients:
1/2 cup raw almond butter
1/2 cup all natural peanut butter
1/4 cup honey
1 dropper of liquid stevia
1 large egg
1 overflowing tsp. vanilla
3/4 tsp. baking soda
1/2 tsp. sea salt
1/2 rolled oats
1/2 cup chocolate chips

Directions:
Preheat oven to 350 degrees and line 2 cookie sheets with parchment paper. In a large bowl, mix together the almond butter, honey, stevia, and egg. Add the vanilla, baking soda, salt, and oats and mix everything together. The batter will be very thick and sticky. Stir in the chocolate chips. Drop cookies onto the lined cookie sheets using two spoons. Gently flatten. Bake for 12-15 minutes, then cool on the cookie sheet for an additional 10 minutes before transferring to a cooling rack.

Friday, August 10, 2012

Hot Fudge Dessert

My mom made this dessert for us occasionally when we were growing up. She always baked it in a particular blue speckled baking dish. I don't ever remember her baking anything else in that dish--it was the hot fudge pudding dish, as far as I was concerned.

When I grew up and wanted to make the recipe for myself, it actually kind of threw me a little that I had to make it in a regular baking dish!

Although the recipe has hot fudge in the name, it was actually quite effortless to adapt to our less refined lifestyle. Consider pairing it with some homemade vanilla ice cream for a delicious dessert free of refined sugar and flour! Amy Green has a fabulous vanilla ice cream recipe in her cookbook, Simply Sugar and Gluten Free.

Hot Fudge Dessert


Ingredients:
1 cup white whole wheat flour
2 tsp. baking powder
1/4 tsp. sea salt
1 and 3/4 cup coconut palm sugar, divided
2 Tbsp. + 1/4 cup cocoa powder
1/2 cup milk
2 Tbsp. olive oil
1 and 3/4 cup hot water

Directions:
Preheat oven to 350. Blend flour, baking powder, salt, 3/4 cup coconut palm sugar, and 2 Tbsp. cocoa in a 3 quart casserole baking dish. Into this mixture, stir milk and oil. In a separate bowl, blend together the 1 cup coconut palm sugar and 1/4 cup cocoa. Sprinkle the sugar/cocoa blend over the batter. Pour the hot water over everything. Do not stir. Bake for 45 minutes. Serve warm.

Wednesday, August 8, 2012

Lifestyle is the New Genetics

On average, children watch television for eight times as many hours as they spend having meaningful conversation with their mom and dad. Don't let advertisers control your children's decisions on health.

Join our sponsor, 180 Chiropractic and Wellnes, for a FREE Advanced Talk where they'll show you how raising a healthy family can be as simple as improving personal choices.


When: Monday, Aug. 13, 6:00 p.m.

Where: 180 Chiro
            4091 Mallory Lane, Suite 114
            Franklin, TN 37067

For more information or to sign up, contact 180 Chiro at 615-595-9063 or info@180chiro.com

Monday, August 6, 2012

Beef Tips...Revisited

One of my first blog posts was a recipe for beef tips--a slow cooker recipe that was easy and, well, unrefined! When I adapted the recipe from Taste of Home's Simple & Delicious, I had to leave out the canned cream of chicken soup. I had no idea at the time that it was so easy to make cream of chicken soup, so I just left it out! The beef tips made from the earlier posted recipe taste fine, but... if you add some homemade cream of chicken soup to them, they're even better! So, I wanted to repost about the beef tips, giving an updated recipe.

Beef Tips


Ingredients:
1 pound beef sirloin tips, cut into 1 inch cubes (I also use different cuts of beef)
2-3 medium carrots, chopped
1 to 1 1/2 cups chopped celery
1 cup chopped onion
1 recipe cream of chicken soup
1 cup beef or chicken broth

Mix all of the ingredients together in the slow cooker. Cook on low for 6-7 hours, or until the meat is tender. Serve over 100% whole wheat egg noodles, spaghetti noodles, or faux-tatoes.

Friday, August 3, 2012

An Easy Pizza Lunch

We make homemade pizzas regularly, and I often double or triple the sauce and refrigerate the leftovers to use for quick and easy lunches like this one, or pizza pockets. It's quite convenient to have the sauce ready to go, especially when the day is busy and the family is hungry!

This is a super easy and fast lunch, and it's a big hit at our house. Because the recipe uses Ezekiel bread, you can rest assured that you're giving your family an excellent source of protein as well.

Toasted Pizzas


Ingredients:
Ezekiel bread
Pizza sauce (about 2 Tbsp. per slice of bread)
Mozzarella cheese (about 1/4-1/2 cup per slice of bread)
Garlic powder

Directions:
To make these pizzas, toast your slices of Ezekiel bread. Spread pizza sauce on the slices, then top with cheese and sprinkle with garlic powder. Bake at 425 until the cheese bubbles and begins to brown.